Popular Products
- Homepage
- Postcard Printing
- Raised Spot UV Postcards

- Create postcards that accentuate your message
- Print on durable 16 pt. cardstock
- Available in 2 sizes
- Soft-touch velvet lamination
- Emboss business logos or images
Raised Spot UV Postcards
Get Started
When would you like to upload artwork?
OR
Get Shipping Estimate
Dare to Be Different
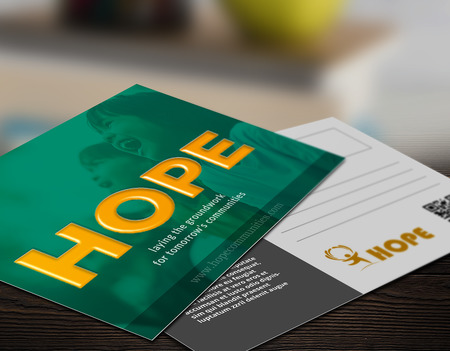
Make your business logos and images stand out with raised spot UV postcard printing. Raise any detail on your custom postcard to bring your customer’s attention where you need it to be.
Raised spot UV postcards emboss key areas you select by 50 microns (or .05 mm). This means text and images can literally rise above your postcards and make them visually stunning.
So don’t settle for an ordinary postcard. Be bold and raise your game. Print raised spot UV postcards today.
Unbelievably Sturdy
All raised spot UV postcards are printed on 16 pt. cardstock, one of the thickest papers we have to offer. The material’s durable nature makes it suitable for promoting high-end products.
Yummy Velvet Lamination
Velvet lamination adds a soft touch to your postcards. It creates a depth in texture that your customers will feel. The combination of raised spot UV and the soft velvet texture makes for quite an experience. It simply must be felt to be fully appreciated.
Swim in Colors
There are no limitations when it comes to colors. Raised spot UV postcard printing works on any image. So no matter how colorful you want your custom postcard to be, our raised spot UV process will be able to handle it.
Frequently Asked Questions
How much of my design can be raised?
We're able to cover up to 30% of the postcard.What's turnaround time?
Turnaround time refers to how many business days it will take to print your personalized postcards. Shipping time is not included.What postcard dimensions are available?
You can print 4” x 6” (popular option) or 5” x 7” postcards.Can raised spot UV be applied on one side only?
Yes. You have the option to print on one or both sides.Not what you're looking for? Check out all postcard printing services.
Raised Spot UV Printing File Requirements
Keep in mind the following file requirements below as you create a design using our downloadable templates:
- The font size should be a minimum of 7 or 8 points. Avoid printing small text or fine lines in raised spot uv.
- Border and stroke must be more than 1.5 points.
- Images and artwork should be at least 300 DPI.
- All files should be in CMYK color mode.
- Make sure there is a 1/8" (0.125") bleed around the trim size.
- The safe zone should be 1/8" (0.125") inside the trim line.
How to Prepare Your Artwork for Raised Spot UV Printing
- Create two layers that differentiate the areas printed in regular ink from the elements with raised spot UV printing.
- The regular CMYK layer shows which areas are printed in ink. The elements should show their actual colors and sizes on print.
- The raised spot uv printing layer only shows the elements that will appear in raised spot UV. The element(s) that will be printed in raised spot UV should have the same location as seen on the CMYK layer. Apply 100% K on the raised spot UV area and place the rest of the design in white.
The images below show the difference between the two layers:


- Alignment is crucial to the file preparation process. The CMYK and raised spot UV printing layers should both have the same size. Common elements must be in the same position on both layers.
Browse by Category
Featured Products
Raised Spot UV Postcard Templates
Our layout templates will show you how to format your artwork. This ensures your postcards print correctly. Follow the steps below to prepare your product for spot uv printing:
- Create two layers on your file.
- The first layer shows the design in regular CMYK color.
- The second layer shows which areas will be printed in spot uv. Color all portions for spot uv printing in 100% K. All other sections that will be printed in regular CMYK should be colored white.
View Raised Spot UV Postcards Templates
Need help with our layout templates?
Please refer to our guided layout instructions.
What Makes Raised Spot UV Postcards Special?
Printing raised spot UV postcards give you a chance to run away from the ordinary. If your main goal is to set yourself apart from the competition, then raised spot UV can help you get there. The raised ink gives postcards an unbelievable texture that sets it apart.
If you’ve never printed raised spot UV postcards before, consider these tips:
- Less is more – Don’t overdo it. For maximum effect, only target design elements that need to be embossed. Just because you can doesn’t mean you should.
- Add realism – One of the advantages of the raised spot UV effect is that it gives background images a realistic texture. Use this to your advantage. For example, this process can give your customers an idea of what your actual products feel like.
- Let your logos fly – Having a logo embossed gives the illusion that it’s about to fly away from the postcard. As it rises from the paper, more emphasis is placed on your logo. It’s a great tool for branding. It makes it easier for customers to remember you.


